This software is intended to assist trainers with travel training by providing a safe virtual environment in which students can practice walking around an urban environment, crossing roads safely using various crossing types: zebra, pelican, puffin and trafic light junction. It also allows a trainer to build environment map that reflect the route(s) that a student may need to learn.
Load the CD in your PC's CD drive; it should automaticallly run. If it does not, run the file labelled "Travel_Trainer" on the CD.
Once started you get the choice to install to you hard drive, or run from CD.
If you have an earlier version installed, please uninstall this first. User files will be preserved, but may cause some conflicts. If they do, then delete these by the procedure outlined below.
Minimun PC specification for satisfactory operation (see Macromedia's site):
This software should run on the following Operating Systems:
For best 3D performance your PC should have at least DirectX 7.
A Macintosh release would be possible but is not yet being considered. If you think it would be useful then please contact us.
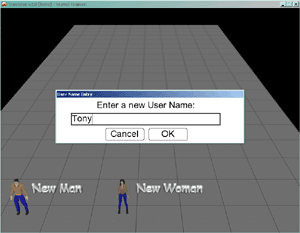
Once the software starts, and all the 3D elements have loaded, you will be presented with the lobby. If this is the first time you have run the program, then you will see just 2 characters, the default "New Man" and "New Woman". Choose one and you are given a dialogue box to give your character a name. (If you run from the CD then this character naming option will not be available.)
If you name the character, it will be saved and available the next time you use the package. If you cancel, your character will not be saved.
Next, you are presented with the main menu page.
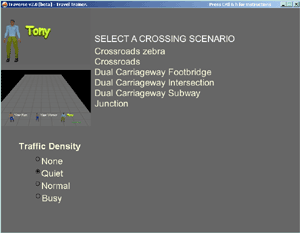
From here, you can modify the appearance of your character, return to the lobby, select the density of traffic that will be in the environment, and choose one of the default environments.

The character can be controlled either by a joystick (steering wheels have been found to be very good) or by keyboard. Keyboard control is via the arrow keys:
UP: Forward
DOWN: Back
LEFT: Turn Left
RIGHT: Turn Right
Pressing the SPACE BAR causes the viewpoint to look Right-Left-Right.
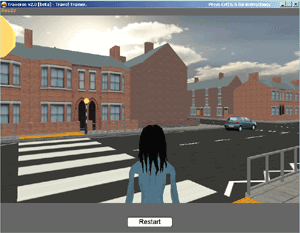
Standing on the bumps of a zebra crossing will cause traffic to come to a halt. Button controlled crossings (puffin and pelican) are activated by colliding with them. A successful activation is accompanied by a click, and the familiar illuminated "WAIT" on apelican crossing.
Press "Restart" to return to the main menu.
Pressing [Control] and "e" while in the main menu will change the package to Edit Mode. The trainer can select an existing map to modify, or add a new one by choosing the "New Blank Map" entry. Pressing [Control] and "e" again returns to Normal Mode.
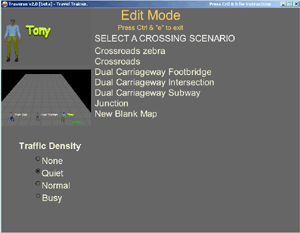
Select a map in Edit Mode and you get the following:
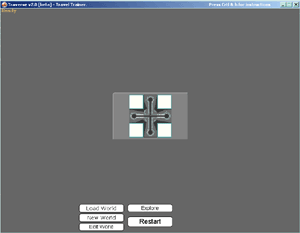
The options are:
NOTE: Please be patient, as many of the things that you do while diting cause the world to be rebuilt. Wait a few seconds before clicking again.
Once in the editor, you will see the following:
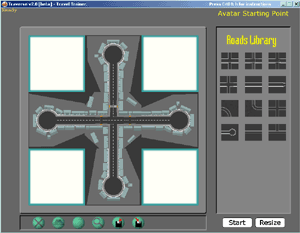
Click on a road square in the "Roads Library" to select it. Click on a grid of the map to add/replace with the selected square. Clicking on a grid square with the same road tile selected will rotate the road square in the grid, allowing you to align roads.
You may find that you need more (or less) room on the map. Cick the resize button to resize the map.
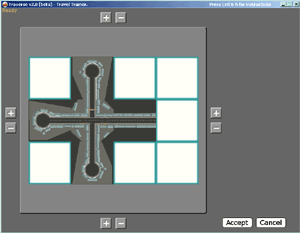
Clicking the + and - buttons add and remove rows on each edge of the map. NOTE: This can be a slow process, so please be patient. You may then Accept or Cancel your changes.
The tools at the bottom of the editor allow you to modify the map further.
![]()
![]() DELETE
DELETE
Toggle On/Off. When on, will delete items clicked on.
![]() EXPLORE
EXPLORE
Toggle On/Off. Changes to 1st person perspective so you can examine the world that you are building. You can steer around with the arrow keys.
![]() NEW GRID
NEW GRID
Replaces the current grid with a blank grid of the same dimensions.
![]() ZOOM (more below)
ZOOM (more below)
Toggle On/Off. Zooms in on the map, and swaps the Roads Library for the Objects Library. This is what you use to add and delete crossings and set an avatar stating point (You need one of these !)
![]() LOAD MAP
LOAD MAP
Brings up the system file browser to allow you to load a map file into the editor.
![]() SAVE MAP
SAVE MAP
Brings up the system file browser to allow you to save the map file currently in the editor.
Zoom & the Objects Library
Select ZOOM and then click on the map. The map view will zoom in to the point clicked and the Object Library will open. Without anything selected in the Object Library, clicking on the map move the centre of the view to that point. With something selected in the Object Library, clicking on the map will add or move the item to that point if possible (the "Avatar Starting Point" will move to the new position if that point is valid (i.e. on the pavement)).

When you have finished editing a map, click the save button and save the file either over an old map, or give it a new (sensible) name.
There is now a programmed method to delete charcters (the button marked "Clear Lobby", available in edit mode). To rename a character, you will need to rename the file using Windows; navigate to the Profiles folder, which will be found at C:\Program Files\ISRG\Traverse\Profiles (unless you installed to somewhere other than the default installation location). Similarly, to delete a single character, simply delete the file with the unneeded character's name.
You can manually rename and delete maps in the same manner (the maps can be found in C:\Program Files\ISRG\Traverse\Maps)
This Software was created using Macromedia Director 8.5 and 3D Studio Max. It was produced at Nottingham Trent University by the Interactive Systems Research Group (ISRG) as part of an "Invest To Save" project set up by the London Borough of Sutton.
If you are interested in or are using the Traverse software, contact us at:
This will allow us to keep you up to date with any patches and updates to ISRG's Travel Training Software.
The software has a web page at http://traverse.isrg.org.uk
If you are interested in work that ISRG do, contact us at:
Alternatively, write to us at:
Interactive Systems Research Group
School of Computing and Technology
Nottingham Trent University
Burtion Street
Nottingham NG1 4BU
UK
© ISRG, Nottingham Trent University, London Borough of Sutton